Managing Organizations
Organizations need to be managed because their membership lists are not fixed: customers and addresses occasionally need to be added, revised or deleted. Follow the steps below to add or edit this information.
Managing Addresses
| 1. | Starting from the Organizations tab, select an organization and click Add Address. |
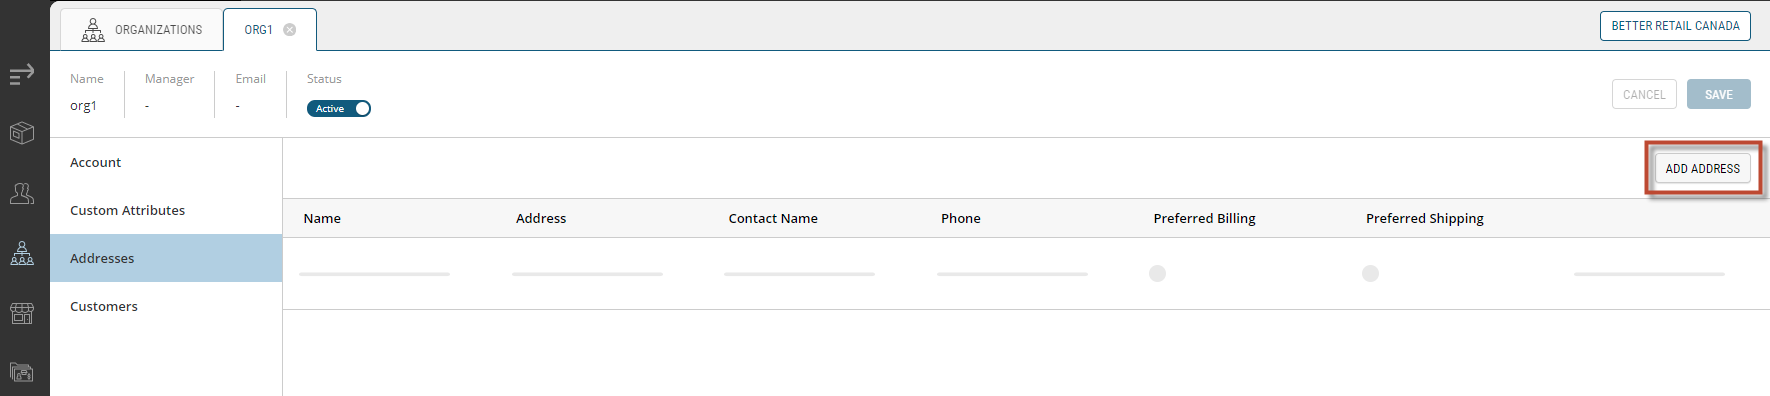
Figure 1 - Shown here is the Add Address button for a particular organization
This will bring up the Add Address box with the Default Attributes tab opened.
| 1. | Enter the required fields (identified with a red asterisk). |
| a. | Address Line 1 |
| b. | Country |
| c. | State/Province |
| d. | City |
| e. | ZIP/Postal Code |
| 2. | Click Apply Changes. |
Be sure to fill out other fields if the information is available.
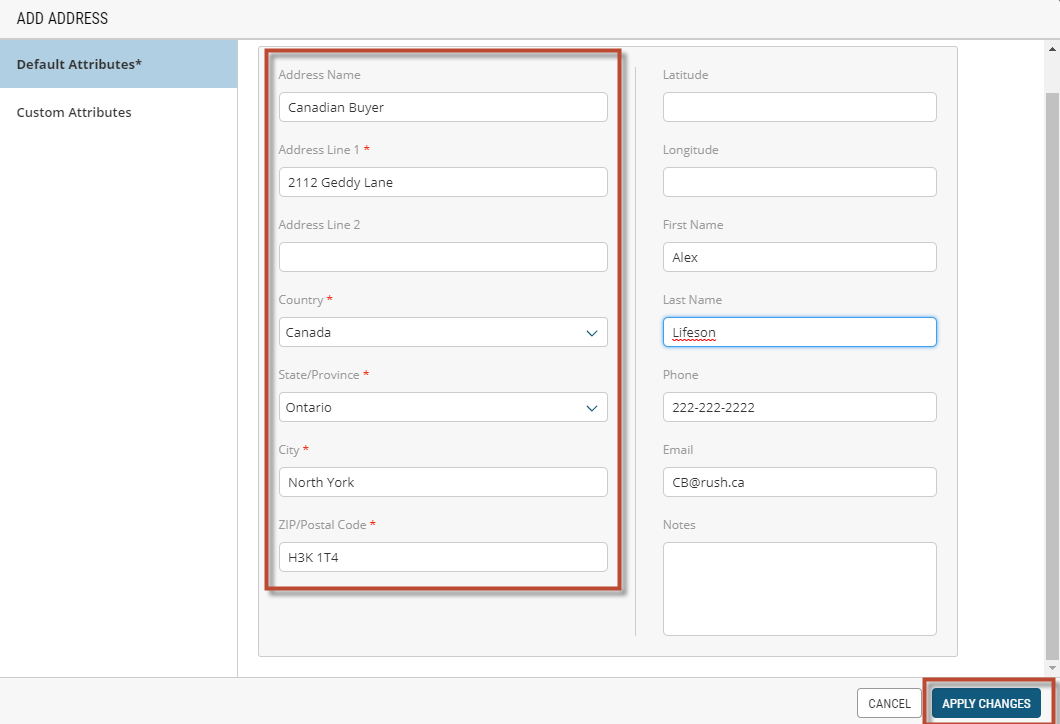
Figure 2 - Address Information field
Managing Customers
| 1. | Starting from the Organizations tab, select an organization and click Manage Customers List. |
This will bring up the Manage Customers box.
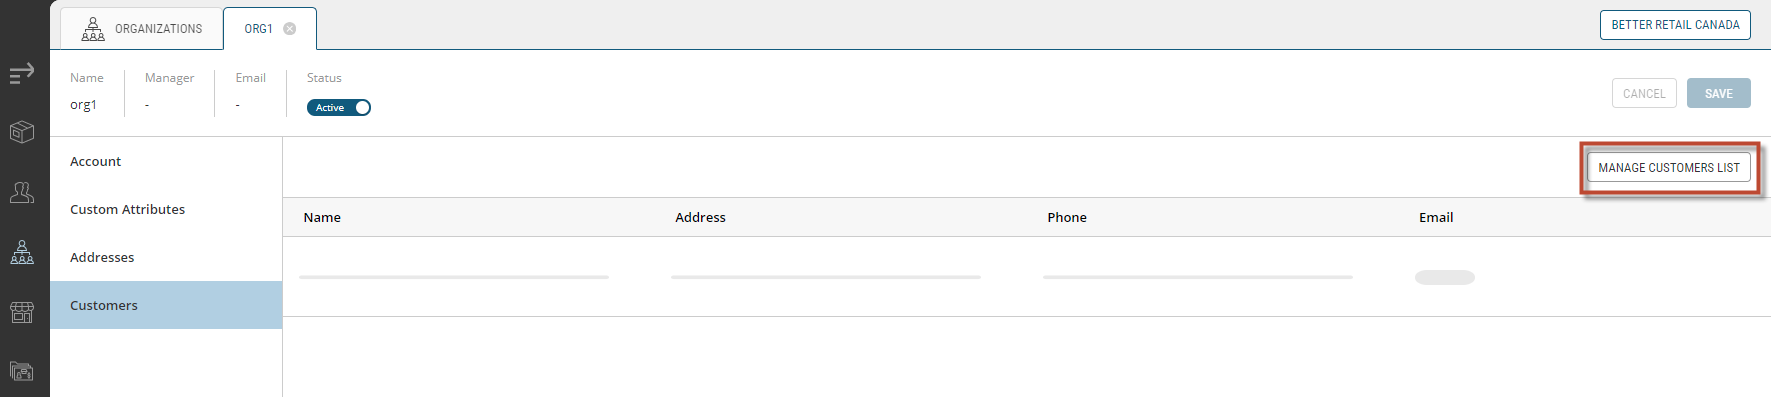
Figure 3 - The Customers section of the Organizations tab
Searching Customers
Use the search filters in the Managing Customers dialog box to speed up organization searches. There are a variety of filtering methods to choose from, depending on what information is known about the organization.
If you know just one key point of information for a particular customer, you can conduct a manual search.
| 1. | Entering known information in the search field. |
| 2. | Click the Magnifying Glassicon. |
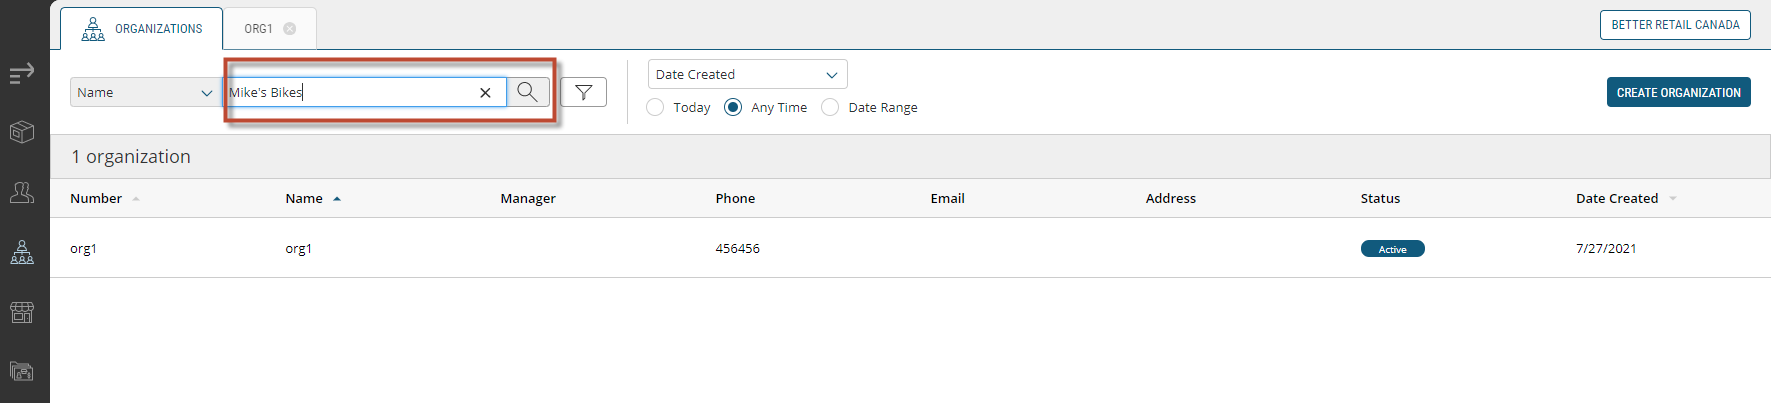
Figure 4 - The Organizations search field
| 1. | Click the drop-down menu to search by last name, email, phone or all criteria. |
| 2. | Select Last Name or Emailor Phone or All Criteria in the search field. |
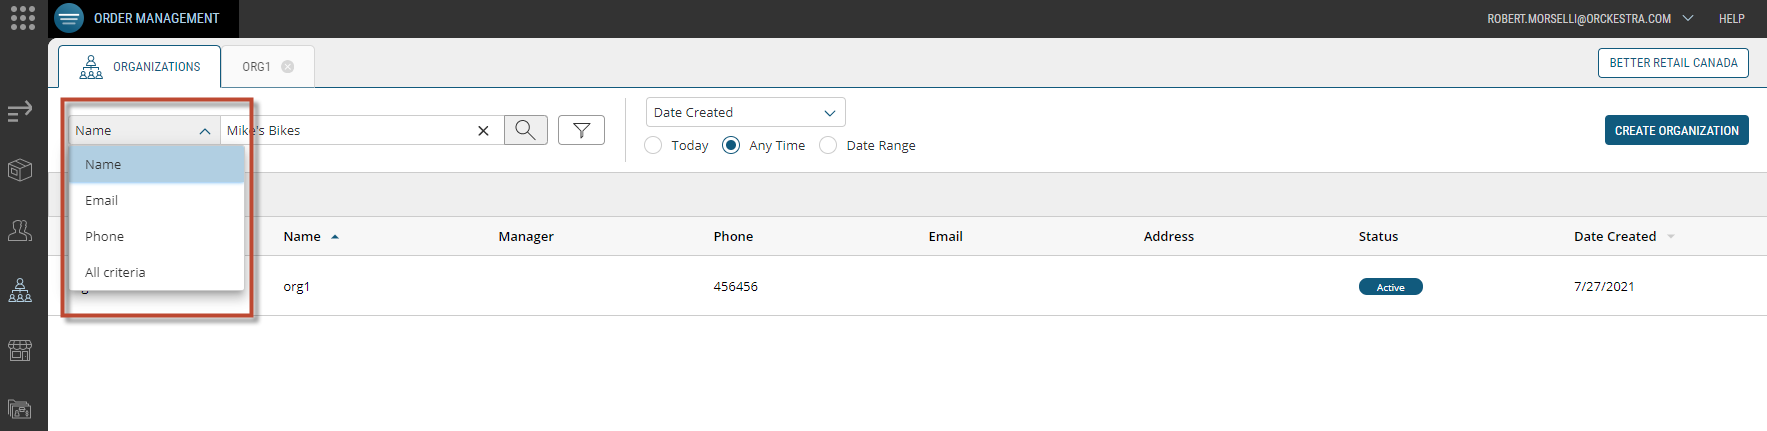
Figure 5 - The various criteria you can use to search Organizations
| 1. | From the Date Created drop down menu, you can select Last Order Date, Last Login or Any. |
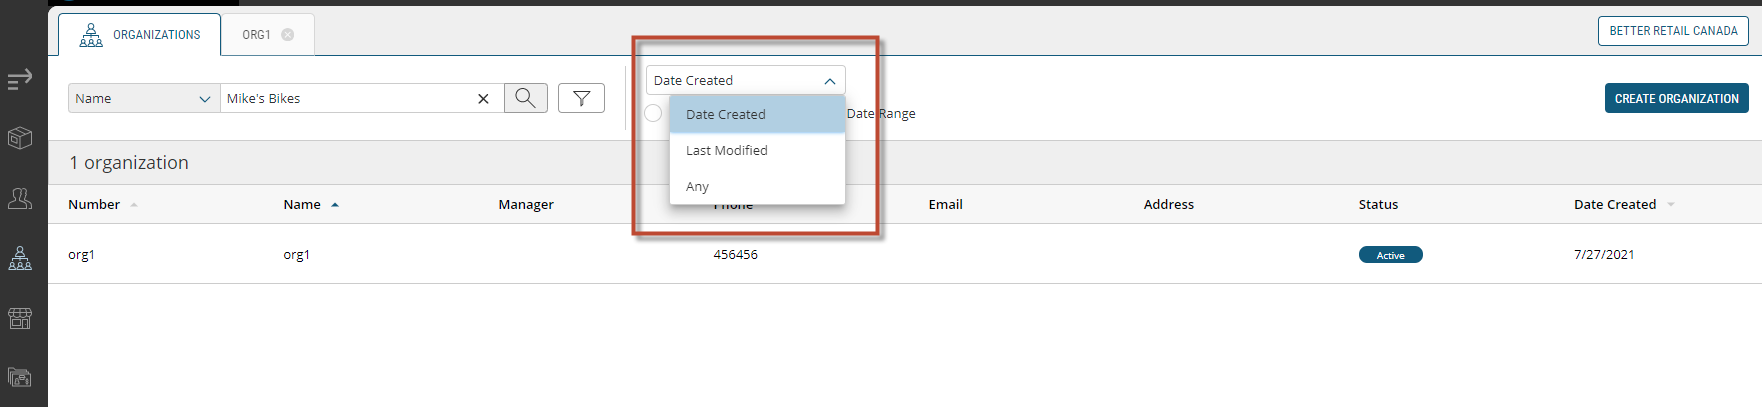
Figure 6 - Organizations search filter
If you know one key point about the timing of an order, you can filter by date range. There are three options:
| 1. | Click Today, Any Timeor, |
| 2. | Click Date Range. |
| 3. | Pick a Start and End date from the calendar picker or, |
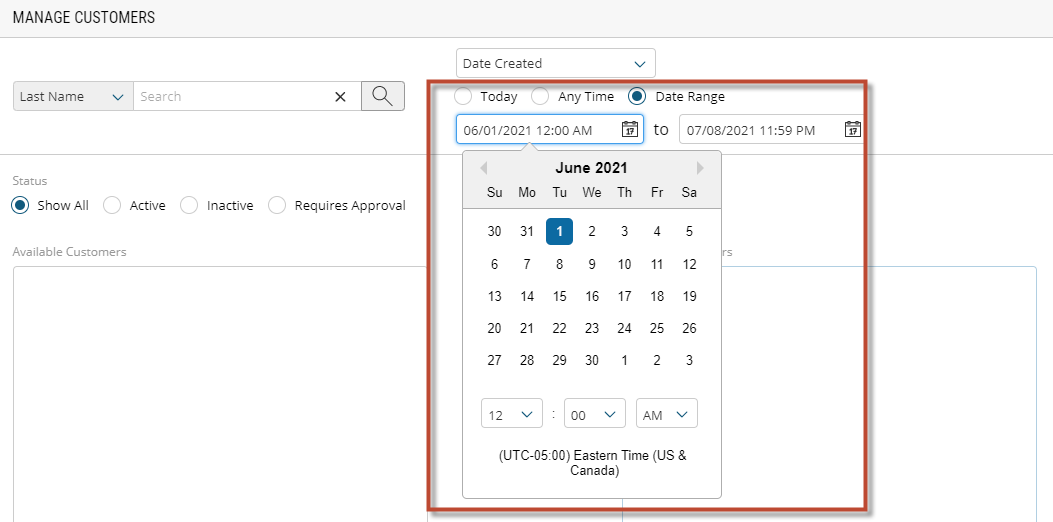
Figure 7 - The calendar picker
You can also filter by customer account Status.
| 1. | Click the Funnel icon. |
| 2. | Select one of the three options from the Status drop down menu: Show All, Active, Inactive. |
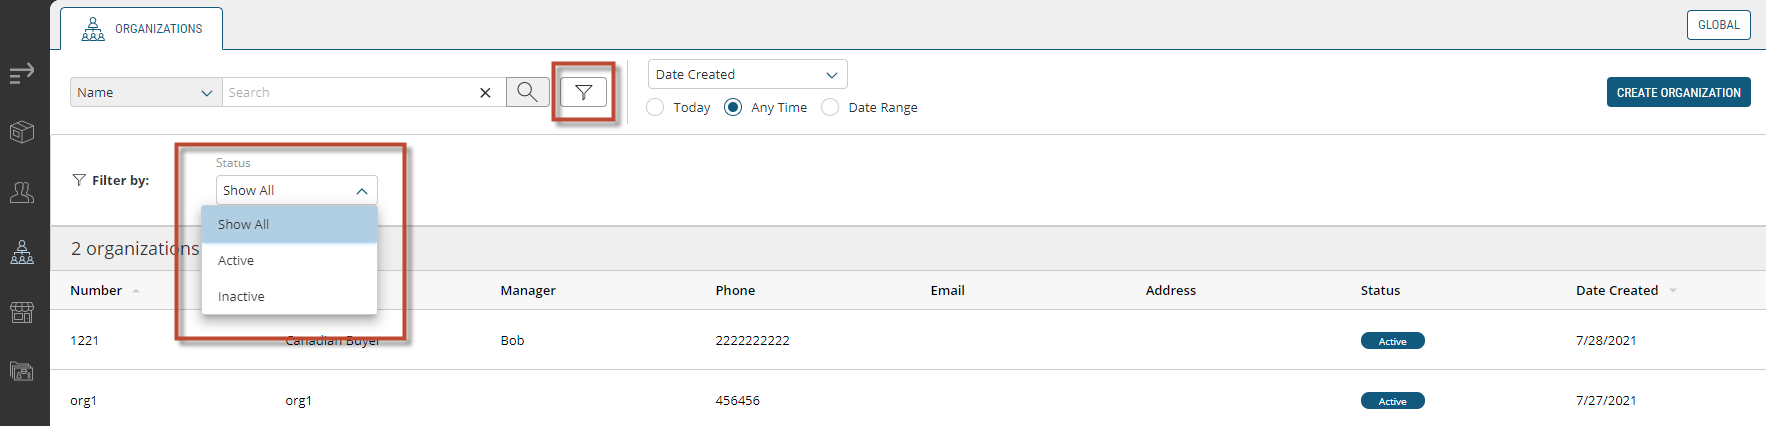
Figure 8 - Active/Inactive filter
Adding or Removing Customers from Organizations
You can add customers to organizations by following these steps:
| 1. | Click a Customer that appears in the Available Customers box. |
| 2. | Click Add to place the customer in the Selected Customer box. |
| 3. | Click Apply Changes. |
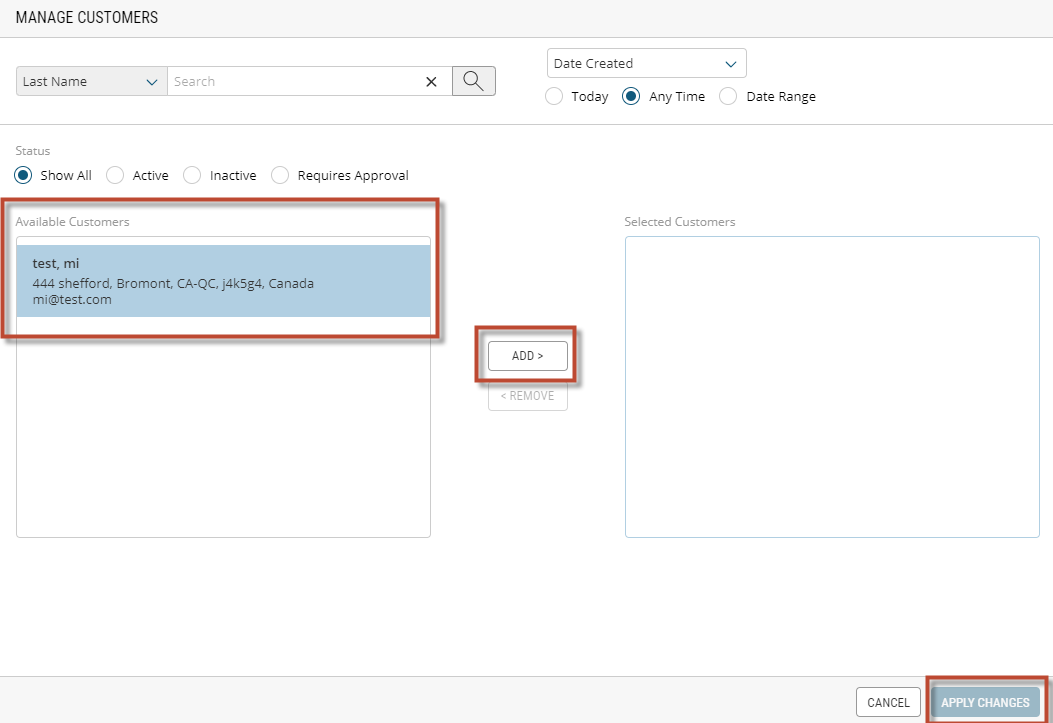
Figure 9 - Adding a customer to an Organization
You can remove customers from organizations by following these steps:
| 1. | Click a Customer that appears in the Selected Customer box. |
| 2. | Click Remove to place the customer in the Available Customer box. |
| 3. | Click Apply Changes. |
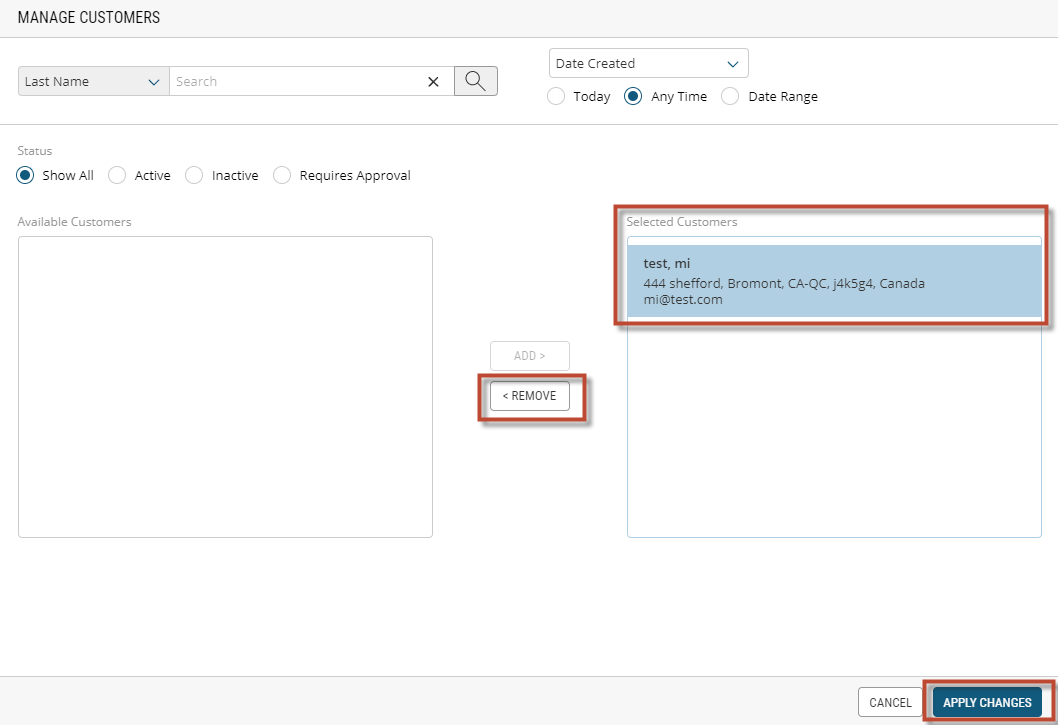
Figure 10 - Removing a customer from an Organization
REFERENCES
| • | About Organizations |
| • | Activating or Deactivating Organizations |
| • | Modifying organizations |
| • | Activating or Deactivating Organizations |